
Jobs to Inbox is a participant in the Amazon Services LLC Associates Program. When you buy through links on this page we may earn a commission, at no extra cost to you. We choose every product ourselves and we are never paid to include one. How we pick.
Work From Home Essentials and Desk Gear
Back Pain From Working at Home? 7 Office Chair Fixes That Help
Find the right office chair for back pain with these 7 easy fixes to improve your posture, reduce discomfort, and work from home more comfortably.
The quick answer
- Adjust your seat so feet are flat and your knees are at a 90-degree angle.
- Ensure your lower back is supported by the chair's curve or a separate pillow.
- Get up and move around for a few minutes at least once every hour.
That nagging ache in your lower back started subtly, but now it’s a constant companion during your workday. You took a remote job for the freedom and flexibility, not to trade a stressful commute for persistent physical pain. Finding the right office chair for back pain can feel overwhelming, but lasting relief is often found not in the most expensive chair, but in how you adjust the one you have.
This guide provides seven specific fixes for your current setup to help alleviate that discomfort. These are adjustments and habits you can implement right away to improve your posture and support your body correctly. While these tips can provide significant comfort, they are not medical advice. If you are experiencing chronic or severe pain, please consult a qualified clinician or physical therapist to address your specific needs.
Our tested picks for an 8-hour day
Best budget pick
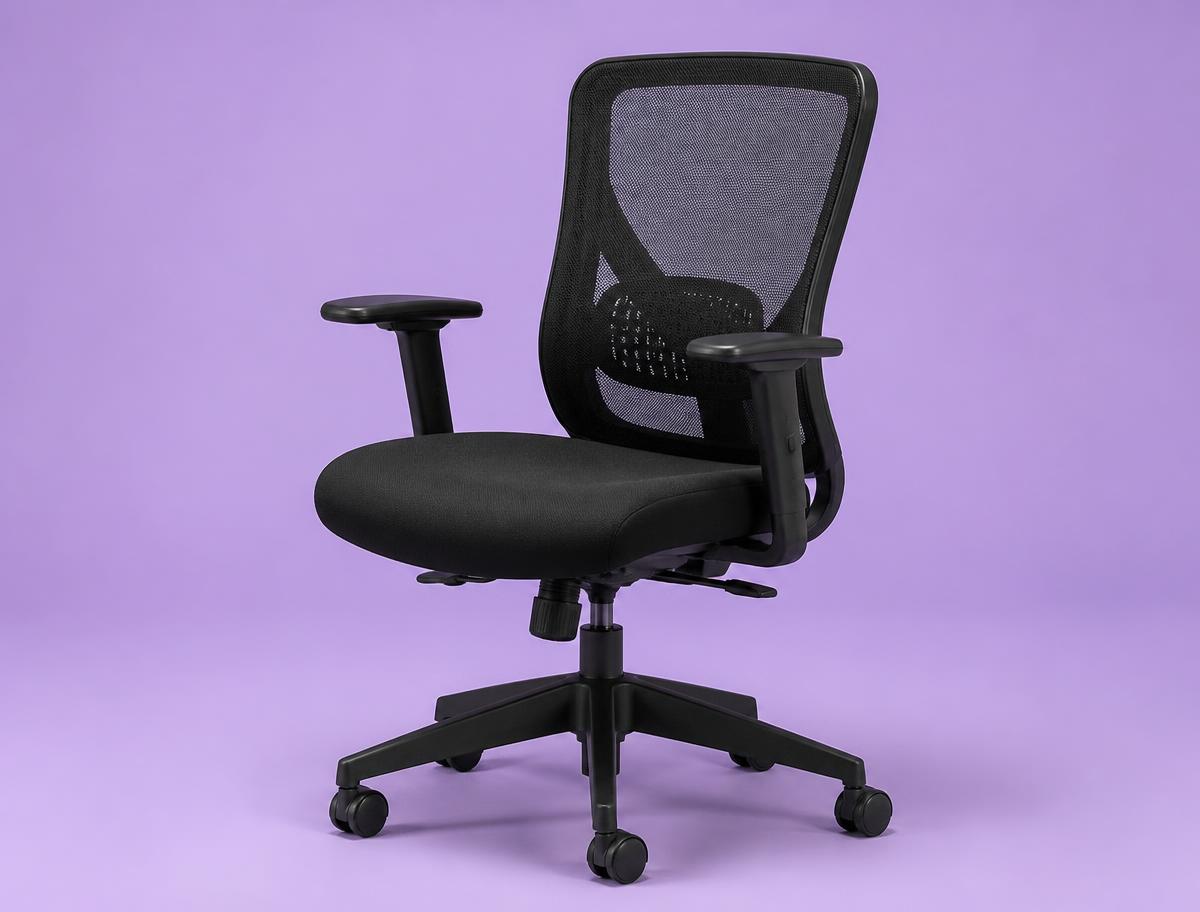
SIHOO M57 Ergonomic Chair
The first real chair after a dining chair or a gaming chair.
This is where the meaningful floor is. The lumbar pad moves up and down and in and out, the armrests adjust in three directions, and the mesh back does not turn into a hotplate by the afternoon. It is rated to 330 pounds, the recline locks in a few positions rather than infinitely, and the seat foam is firmer than most people expect on day one. It breaks in inside two weeks and it holds up.
Instead of a sit-stand desk
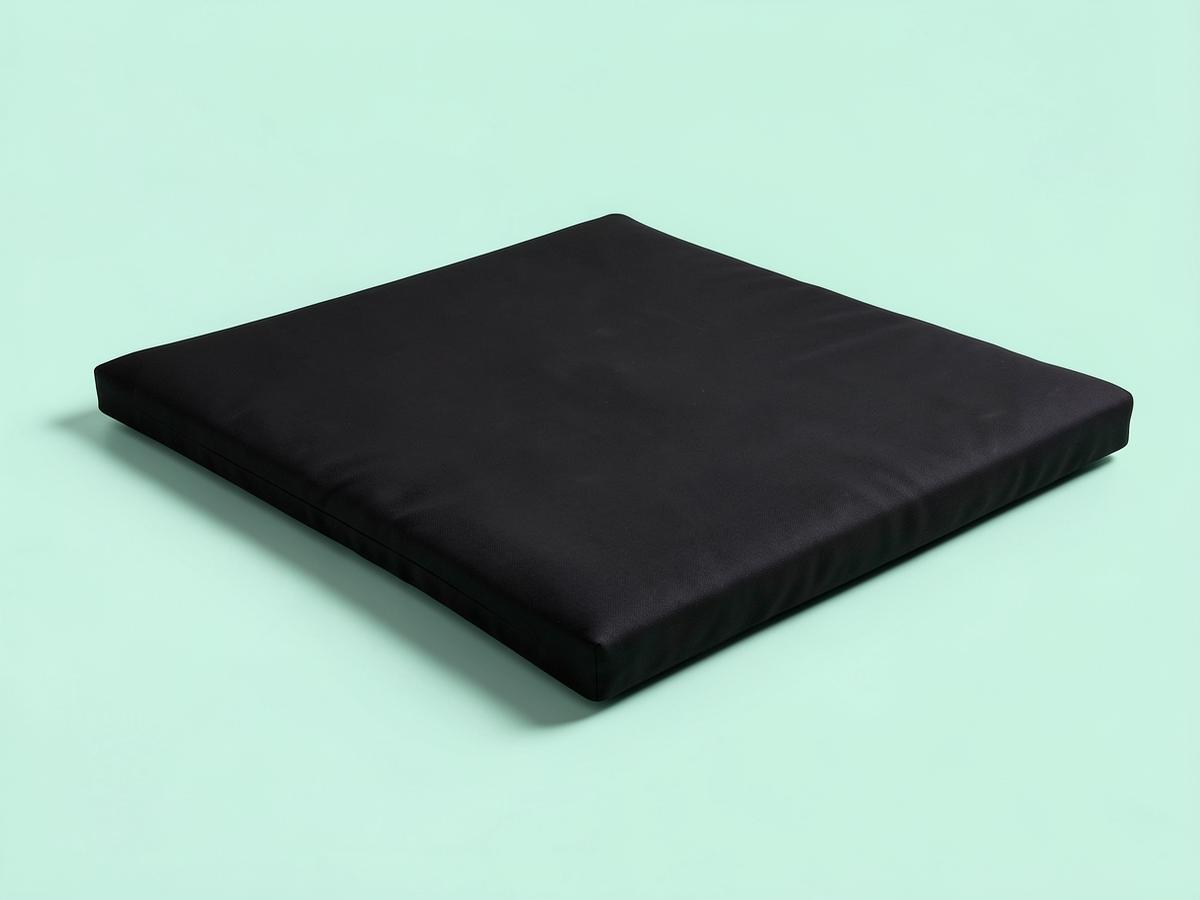
ComfiLife Anti Fatigue Floor Mat
Anyone who stands to work and quits after an hour because their feet hurt
The reason most people abandon standing is not their back, it is their feet, and a three-quarter-inch cushioned mat fixes that for roughly the price of a takeaway for two. The foam here is dense enough that it does not flatten permanently after a month, which is where the very cheap mats fail, and the bevelled edges do not curl up and trip you. Stand on a hard floor for two hours and your heels ache; stand on this and you stop thinking about your feet, which is exactly the point. It also works in a kitchen, which is worth knowing if the standing experiment does not stick.
The one I use — best overall
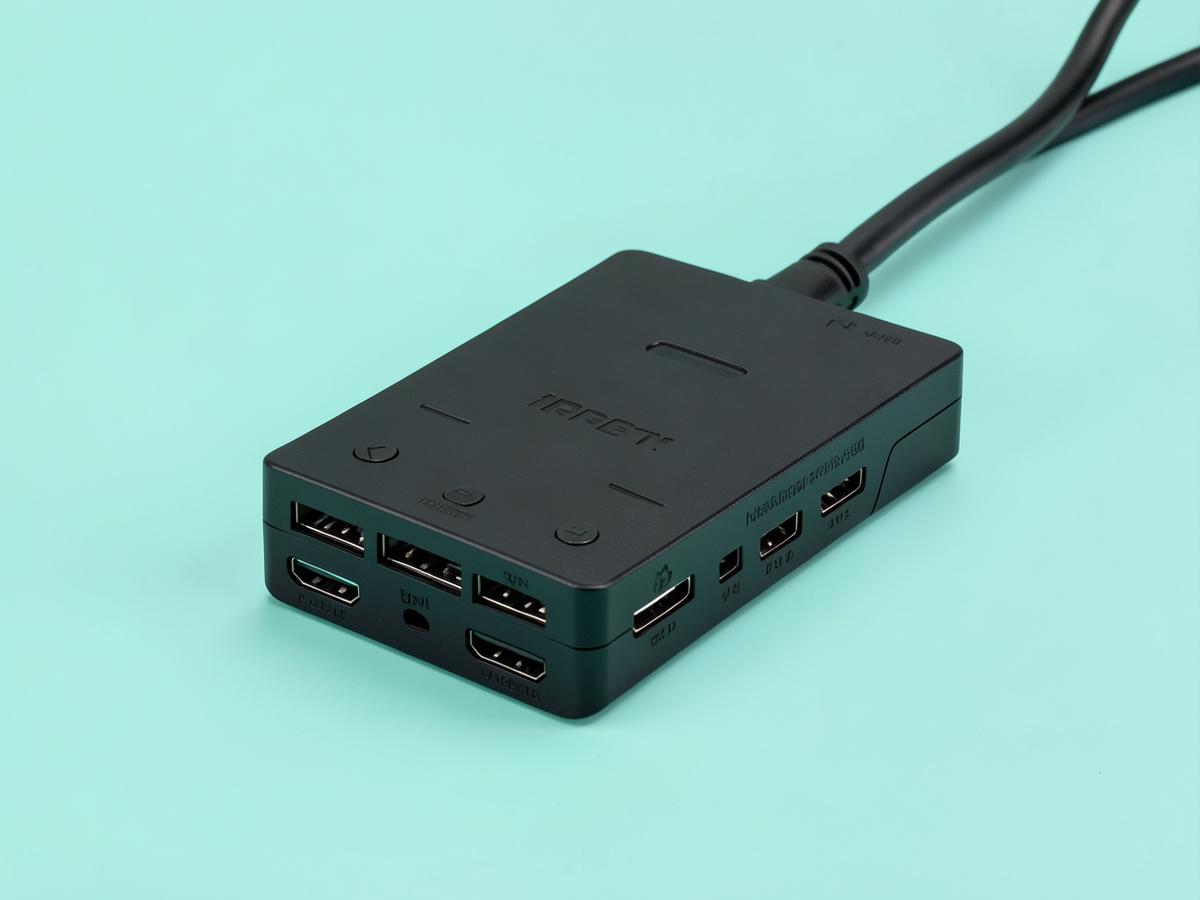
Anker Laptop Docking Station Dual Monitor 8-in-1
Two external screens, one cable, and a morning routine you stop noticing.
Months in, the thing I notice about this dock is that I do not notice it. One USB-C cable goes into the laptop and two monitors, a keyboard, a mouse, a headset and the charger all come alive at once. It handles two screens over the twin HDMI outputs, passes power through to the laptop so there is no separate charger to fumble for, and includes ethernet — which matters more than people expect, because a wired connection during a long call is noticeably steadier than a flat's wireless. It runs warm after a full day, which is normal for the class, and the fixed cable is short enough that the dock has to sit near the laptop rather than tucked away behind the desk. Neither is a real complaint. What matters is that it has never dropped a screen mid-call, which is the failure mode that makes cheap docks worthless. If you work from a laptop with two monitors in front of you, this is the purchase that removes a small irritation from every single working day, and it costs less than a decent office chair cushion arrangement.
The Ache of a Bad Setup
Working from home has blurred the lines between our living spaces and our offices. The kitchen table, the sofa, or an old dining chair were fine for a little while. But over time, these makeshift workstations take a toll. Your body, especially your back, pays the price for poor ergonomics.
The frustration is real. You’re trying to focus on your work, to be productive and meet deadlines, but a dull throb or a sharp pinch constantly pulls your attention away. It affects your mood, your focus, and your overall well-being. The problem is that our bodies are not designed to stay in one fixed position for eight hours a day, especially not in a position that strains our muscles and spine. The solution lies in creating an environment that supports your body’s natural alignment.
Finding the Right Office Chair for Back Pain
The perfect chair is one that is perfectly adjusted to your body. You do not necessarily need to spend a lot of money on a brand new piece of furniture. The key is understanding the principles of ergonomic support and applying them to your current situation. A highly adjustable chair is a powerful tool, but only if you know how to use its levers and knobs to your advantage.
We will walk through the seven most critical adjustments. For each one, we will explain why it matters, how to set it correctly, and what you can do if your current chair is missing that specific feature. This is about making small, intentional changes that add up to a big difference in your daily comfort. Think of your chair not just as a place to sit, but as a tool you configure for high performance and long-term health.
1. Seat Height
The height of your seat is the foundation of your entire posture. If it is wrong, everything else will be thrown out of alignment as your body tries to compensate. Getting this first step right is arguably the most important fix you can make. It directly impacts the angle of your hips, knees, and ankles, and it sets the stage for a healthy spinal position.
When your chair is too high, your feet may dangle or barely touch the floor. This places pressure on the backs of your thighs, which can restrict blood flow and lead to numbness or discomfort. It also encourages you to slide forward to find a stable footing, causing you to lose contact with the backrest and its crucial lumbar support. Your spine ends up in a slumped, C-shaped curve instead of its natural S-shape.
Conversely, if your chair is too low, your knees will be positioned higher than your hips. This causes your pelvis to tilt backward, flattening the natural curve of your lower back and placing significant strain on your lumbar spine. This position can lead to lower back pain and stiffness over time, as your muscles work overtime to support a slumped posture. It also tends to make you hunch your shoulders forward to reach your keyboard, creating tension in your neck and upper back.
How to Fix It: Sit in your chair with your back against the backrest. Use the height adjustment lever, typically found under the right side of the seat, to raise or lower your chair. The goal is to have your feet resting flat on the floor with your thighs approximately parallel to the ground. Your knees should be at or slightly below the level of your hips, forming an angle of about 90 to 100 degrees. You should feel stable and grounded, without any pressure points under your thighs.
If Your Chair Does Not Adjust: If your chair is stuck at a height that is too tall for you, the best solution is to bring the floor up to your feet. A dedicated footrest is ideal for this purpose. You can find simple platforms, angled rests, or even dynamic ones that encourage movement. In a pinch, a sturdy box, a stack of thick books, or a yoga block can serve the same purpose. The key is to create a stable surface that allows your feet to rest flat and your knees to achieve that proper 90-degree angle. If the chair is too low, a firm seat cushion can add the necessary height. Look for one that is dense enough that it does not compress completely when you sit on it.
2. Lumbar Support
Your spine has a natural inward curve in the lower back, known as the lumbar curve. Maintaining this curve while you sit is essential for preventing back pain. When you slouch, this curve flattens or even reverses, which puts stress on the ligaments and discs in your lumbar spine. Proper lumbar support helps you maintain this natural curve without muscular effort.
Without adequate support, your lower back muscles have to work constantly to hold your spine in a healthy posture. Over the course of a long workday, these muscles become fatigued. This fatigue leads you to slump forward, placing even more strain on your spinal structures. This cycle of muscle fatigue and poor posture is a primary driver of the chronic lower back pain many remote workers experience. An effective office chair for back pain must address this specific area.
An ideal ergonomic chair has a backrest that is shaped to match the natural S-curve of the spine. Many chairs offer adjustable lumbar support, which can be a panel that moves up and down or a knob that changes the depth or firmness of the support. This adjustability is critical because the exact location and prominence of the lumbar curve vary from person to person. A support that is too high or too low can be just as uncomfortable as no support at all.
How to Fix It: First, sit all the way back in your chair, so your tailbone is touching the backrest. The lumbar support should fit snugly into the curve of your lower back. If your chair has an adjustable support, move it up or down until it rests in the small of your back, typically just above your belt line. If it has a depth or pressure adjustment, dial it in so you feel a gentle, consistent pressure. It should feel supportive and comfortable, not like a hard object pushing into your spine. The goal is to be encouraged into a healthy posture, not forced into an unnatural arch.
If Your Chair Lacks Support: This is a very common issue with basic office chairs or when using a dining chair. The fix is simple and effective: add your own support. A rolled-up towel can work as a temporary measure to test the position and feel. For a more permanent solution, you can purchase a dedicated lumbar support pillow. These come in various shapes and materials, such as memory foam or mesh-covered frames. When choosing one, look for a model with straps that can secure it to your chair, preventing it from sliding down throughout the day. Place the pillow in the small of your back to provide the support your chair is missing.
3. Seat Depth
Seat depth refers to the distance from the front edge of the seat to the backrest. This is a frequently overlooked adjustment, but it is vital for both back support and leg comfort. The proper seat depth allows you to sit all the way back to take full advantage of the backrest and lumbar support, while leaving enough space between the front edge of the seat and the back of your knees.
If the seat is too deep, you have two bad options. You can either sit all the way back, in which case the front edge of the seat will press into the back of your knees and calves. This pressure can cut off circulation, lead to leg numbness, and make you feel trapped in the chair. The other option is to perch on the edge of the seat to relieve that pressure, but this means your back is completely unsupported, forcing you to slump.
If the seat is too shallow, you will not have enough surface area to support your thighs. This can make you feel unstable and unsupported, as if you are about to slide off the chair. It also concentrates your body weight on a smaller area, which can create uncomfortable pressure points on your sit bones. A shallow seat fails to properly distribute your weight, which can contribute to fatigue and discomfort over a long day.
How to Fix It: Sit all the way back in your chair, making sure your back is firmly against the backrest and its lumbar support. Once you are in this position, check the space between the front edge of the seat and the back of your knees. You should be able to fit about two to three fingers comfortably in this gap. This ensures there is no pressure on the sensitive area behind your knees, allowing for healthy blood circulation. Most ergonomic chairs with this feature have a lever or knob that allows you to slide the seat pan forward or backward to achieve this ideal spacing.
If Your Chair Does Not Adjust: This is a tougher problem to solve without replacing the chair, but you do have options. If the seat is too deep, the best solution is to use a back support or cushion. By adding a thick lumbar pillow or a full-back cushion, you effectively move the backrest forward, reducing the functional depth of the seat. This allows you to sit with full back support while still maintaining that crucial gap behind your knees. If the seat is too shallow, there is less you can do. The main priority is ensuring you are using the backrest fully, even if your thighs are not completely supported. In this case, ensuring your feet are firmly supported on the floor or a footrest becomes even more critical for overall stability.
Fine-Tuning for Upper Body Comfort
Once your lower body and back are properly supported, the next step is to address your upper body. The position of your arms, shoulders, and neck are directly influenced by your armrests and the height of your screen. Misalignment here is a common cause of tension headaches, shoulder pain, and neck stiffness.
These adjustments are about creating a relaxed and neutral posture from the waist up. Your shoulders should be down and back, not hunched up by your ears. Your neck should be in a neutral position, with your head balanced over your spine, not craning forward to see your monitor. Achieving this requires a thoughtful approach to the components of your workstation that support your arms and guide your gaze.
4. Armrest Height
Armrests serve a simple but important purpose: to support your forearms and take the weight off your shoulders. When your arms are unsupported, the muscles in your neck and shoulders must constantly contract to hold them up. This sustained tension is a direct path to muscle fatigue, knots, and pain in your upper back, neck, and shoulders.
If armrests are too high, they will force your shoulders to shrug upward. This creates immediate tension in your neck and shoulder muscles. Working in this position for hours can lead to significant stiffness and pain. It can also contribute to nerve impingement issues in the shoulder or neck.
If armrests are too low, they are effectively useless. Your arms will not reach them without you leaning or slumping to one side, which defeats the purpose and introduces new posture problems. You will end up with unsupported arms, leading to the same shoulder and neck fatigue as having no armrests at all. Proper armrest height allows your shoulders to remain completely relaxed.
How to Fix It: Sit in your chair with your back supported and your shoulders relaxed. Let your upper arms hang naturally at your sides. Adjust the armrest height so that they just meet your elbows, allowing your forearms to rest comfortably and parallel to the floor. Your elbows should be bent at an angle of about 90 degrees when your hands are on your keyboard. Some chairs also offer width and pivot adjustments for the armrests. If you have these, adjust them so your arms are not splayed out too wide and the pads are positioned to support your forearms during your typical tasks.
If Your Chair Lacks Adjustable Armrests: If your armrests are fixed at the wrong height, you may be better off removing them entirely. Ill-fitting armrests often cause more harm than good by forcing you into an unnatural posture. You can typically unscrew them from the underside of the chair. If your chair has no armrests, or you have removed them, the key is to ensure your desk and keyboard are at the correct height to allow your shoulders to remain relaxed while you type. Your desk surface essentially becomes your support, so making sure your chair is high enough relative to the desk is critical.
5. Screen Height
The position of your computer screen dictates the posture of your head and neck. Your body will always follow your eyes. If you have to look down to see your screen, your neck will bend forward, and your upper back will round to follow. This forward head posture places an immense amount of strain on the muscles and vertebrae in your neck.
Think of your head as a bowling ball. When it is balanced directly on top of your spine, your neck muscles do very little work. But for every inch your head juts forward, the force on your spine increases significantly. Holding this forward-head position to look at a laptop sitting on a desk is a recipe for neck pain, upper back stiffness, and tension headaches.
Conversely, if your screen is too high, you will have to tilt your head backward to see it. This can compress the vertebrae in your neck and lead to a different kind of pain and stiffness. The goal is to find the neutral position where your neck is straight and your head is balanced comfortably over your shoulders. This single adjustment can be transformative for anyone who suffers from persistent neck pain.
How to Fix It: Sit in your properly adjusted chair, looking straight ahead. The top of your computer monitor should be at or just slightly below your eye level. When you look at the center of the screen, your gaze should be angled slightly downward, about 15 to 20 degrees. The screen should also be about an arm's length away from you. You should be able to comfortably read the text on the screen without leaning forward or squinting.
If You Use a Laptop: Laptops are notoriously bad for ergonomics because the screen and keyboard are attached. If you place the keyboard in a comfortable position, the screen will be far too low. The best solution is to treat your laptop as a monitor. Place it on a stand or a stack of books to raise the screen to the proper eye level. Then, use a separate, external keyboard and mouse placed on your desk surface. This allows you to position both the screen and the input devices independently for optimal posture. This small investment in an external keyboard and mouse can completely change your work-from-home comfort.
Investing in Your Career: Equipment and Spotting Scams
Creating a comfortable and productive home office often requires some investment. A good chair, a monitor stand, or an external keyboard are tools of your trade as a remote professional. Many legitimate remote-first companies recognize this and offer a stipend or allowance for home office equipment as part of their benefits package. This is a great perk that shows a company is invested in its employees' well-being.
However, this practice has also been co-opted by scammers. A common red flag for a fake job offer is a fraudulent equipment-buying process. The scam typically involves a "new employer" sending you a check with instructions to deposit it immediately. They will then tell you to use a portion of that money to purchase equipment from their "preferred vendor," and often to wire the remaining funds back to them or to another account.
The check is fake. It will appear to clear your bank account initially, a process that can take a few days. During this time, the scammers pressure you to act quickly and buy the equipment. When the bank eventually discovers the check is fraudulent, they will reverse the deposit and withdraw the full amount from your account. By then, you have already sent your real money to the "vendor," who is part of the scam. You are left responsible for the full amount of the bad check, and you have lost the money you sent for the non-existent equipment.
Legitimate companies will never ask you to handle money this way. They will either provide the equipment directly, give you a company card to make purchases, or have you buy the items and submit receipts for reimbursement. Never, under any circumstances, should you deposit a check from a new employer and then wire money to another party. Be suspicious of any hiring process that feels rushed, involves communication only through text or messaging apps, or promises a high-paying job with little to no interview process. Always verify the legitimacy of a company and job offer through independent research before providing any personal or financial information.
Supporting Your Body From Head to Toe
Ergonomics is not just about the chair; it is about your entire body and how it interacts with its environment. Even with a perfectly adjusted chair and desk, you need to consider your feet and, most importantly, the need for movement. A static posture, even a good one, can lead to stiffness and discomfort if held for too long.
These final two fixes complete the puzzle, ensuring your entire body is supported and that you are building healthy habits for long-term comfort. They address the foundation of your posture—your feet—and the dynamic nature of the human body.
6. Use a Footrest (If Needed)
We touched on this when discussing seat height, but it deserves its own focus. The position of your feet is the base of your entire postural pyramid. If your feet are not stable and supported, your whole body will be unstable. The primary reason for a footrest is to support your feet when your chair, even at its lowest setting, is too high for you to place them flat on the floor.
When your feet are dangling, your body will instinctively seek stability by sliding forward in your chair. This causes you to lose contact with the backrest, negating your lumbar support and leading to a slumped posture. It also places unhealthy pressure on the back of your thighs, which can impede circulation. Even if your feet can touch the floor, a footrest can be beneficial. It can help maintain the optimal 90-degree angle at your knees and encourage better pelvic alignment, especially for shorter individuals.
A good footrest provides a stable, firm surface. Some are simple platforms, while others are angled to reduce pressure on the ankles. There are also dynamic footrests, like rockers or bars, that encourage small movements throughout the day. This subtle motion, often called "fidgeting," can help improve circulation and prevent the stiffness that comes from holding a single position for too long.
How to Fix It: If your feet cannot rest flat on the floor while seated with your back against the backrest and your knees at a 90-degree angle, you need a footrest. Place it on the floor under your desk. When you place your feet on it, they should be flat and fully supported. Your thighs should be parallel to the floor, and you should feel stable and grounded. The height should be just enough to achieve this position without raising your knees too high.
DIY and Alternative Options: You do not need to buy a purpose-built footrest right away. A sturdy, flat-surfaced object of the right height can work perfectly. A ream of printer paper, a thick textbook, a yoga block, or a small wooden box can all serve this purpose. The key is that it is stable and does not slide around. Experiment with different heights until you find what allows you to maintain the proper leg and back posture comfortably.
7. Take Movement Breaks
Perhaps the most crucial "fix" for back pain is not an adjustment at all, but a change in habit. The human body is not meant to be sedentary. No matter how perfect your ergonomic setup is, staying in one position for hours on end will lead to muscle stiffness, reduced blood flow, and discomfort. The next position is always the best position.
Movement is essential for spinal health. It lubricates the joints, nourishes the spinal discs, and improves circulation to your back muscles. Taking regular, short breaks to get up, stretch, and walk around is one of the most effective ways to combat the negative effects of prolonged sitting. These breaks do not need to be long to be effective. Even a minute or two every half hour can make a dramatic difference.
These breaks are also beneficial for your mental focus and productivity. Stepping away from your screen gives your eyes a rest, reducing strain. It can help clear your head, reduce stress, and allow you to return to your task with renewed energy. Building this habit is just as important as finding a good office chair for back pain.
How to Fix It: Set a timer or use a simple application on your computer or phone to remind you to get up at least once every hour, and ideally every 30 minutes. When the reminder goes off, stand up. You can walk to the kitchen for a glass of water, do a few simple stretches, or just walk around the room for a minute. The goal is to change your posture and activate your muscles.
Consider incorporating simple stretches into your breaks. A gentle backbend, side stretches, or a forward fold can help release tension. You can also do shoulder rolls or neck stretches to combat upper body stiffness. The key is consistency. Making movement a non-negotiable part of your workday is a powerful strategy for preventing back pain before it starts and managing it if it is already present.
What to Do Today
Feeling motivated to fix your back pain is a great start, but turning that motivation into action is what matters. Here is a concrete plan to get started right now.
- Assess Your Current Chair: Go sit in your chair right now. Run through the first four fixes in order: seat height, lumbar support, seat depth, and armrest height. Use this guide to adjust each one. If a feature is missing, implement the suggested workaround using items you have at home, like a cushion or a stack of books.
- Check Your Screen and Feet: Next, look at your screen height. Is the top of the monitor at or below eye level? If not, find something to raise it. If you use a laptop, commit to finding an external keyboard and mouse. Then check your feet. If they are not flat on the floor, find a temporary footrest today.
- Set a Movement Timer: The most important habit starts now. Set a recurring timer on your phone or computer for every 30-45 minutes for the rest of your workday. When it goes off, stand up. Walk for one minute. Do not skip it.
- Make a Plan: After trying the fixes, decide what is missing. Do you need a dedicated lumbar pillow? A real footrest? An external keyboard? Make a list of one or two items that would make the biggest difference and plan to acquire them. You do not need to solve everything at once, but taking the first step to improve your workspace is a powerful investment in your health and remote career.
Pay figures are typical ranges, not guarantees. See today's live jobs.